Mastering GitHub OmniAuth Integration in Ruby on Rails: A Step-by-Step Guide

Photo by Roman Synkevych on Unsplash
Step 1:
- Go to the GitHub Developer Settings page: https://github.com/settings/developers
- Click on the “New OAuth App” button.
Fill in the required fields:
Application Name: Choose a name for your application.
- Homepage URL: This should be the URL of your application’s home page.
- Authorization callback URL: This should be the URL where GitHub will redirect users after authentication. For development, use something like
[http://localhost:3000/auth/github/callback](http://localhost:3000/auth/github/callback.).
4. Click on “Register application” to create the OAuth application.
5. Once created, take note of the “Client ID” and “Client Secret” values, as you’ll need them later.
Step 2: Add the omniauth-github gem
In your Rails application’s Gemfile, add the following line:
gem 'omniauth-github’
gem "omniauth-rails_csrf_protection"
Then run bundle install in your terminal.
Step 3: Configure OmniAuth
First define your application id and secret in config/initializers/devise.rb. 273 no line. Configuration options can be passed as the last parameter here as key/value pairs.
config.omniauth :guthub, 'github_CLIENT_ID', 'github_CLIENT_SECRET', {}
Then add the following to ‘config/routes.rb’so the callback routes are defined.
devise_for :users, controllers: { omniauth_callbacks: 'users/omniauth_callbacks' }
Make sure your model is omniauthable. Generally this is /app/models/user.rb
devise :omniauthable, omniauth_providers: [:github]
Then make sure your callbacks controller is setup app/controllers/users/omniauth_callbacks_controller.rb:
# app/controllers/users/omniauth_callbacks_controller.rb:
class Users::OmniauthCallbacksController < Devise::OmniauthCallbacksController
def github
# You need to implement the method below in your model (e.g. app/models/user.rb)
@user = User.from_omniauth(request.env['omniauth.auth'])
if @user.persisted?
flash[:notice] = I18n.t 'devise.omniauth_callbacks.success', kind: 'Github'
sign_in_and_redirect @user, event: :authentication
else
session['devise.github_data'] = request.env['omniauth.auth'].except('extra') # Removing extra as it can overflow some session stores
redirect_to new_user_registration_url, alert: @user.errors.full_messages.join("\n")
end
end
end
and bind to or create the user model/user.rb
def self.from_omniauth(access_token)
data = access_token.info
user = User.where(email: data['email']).first
# Uncomment the section below if you want users to be created if they don't exist
unless user
user = User.create(
email: data['email'],
password: Devise.friendly_token[0,20]
)
end
user
end
That’s it! Your app now supports GitHub authentication.
If your face any error, like can not verify CSRF token, then add this command in controller/application_controller.rb
skip_before_action :verify_authenticity_token

> Written by
Emdadul Islam
Software Engineer. View profile →
Read more

How to Deploy an AI Agent with Amazon Bedrock AgentCore
Deploy AI agents with Amazon Bedrock AgentCore for scalable configuration on AWS, integrating with frameworks like LangGraph and CrewAI
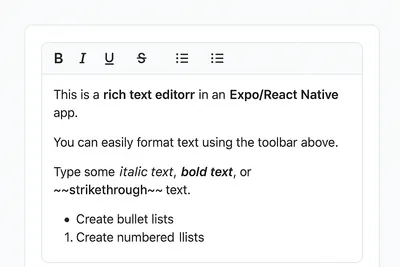
How to Add a Native Rich Text Editor in Expo / React Native (No WebView)
Use expo-rte for a native rich text editor in Expo/React Native, offering cross-platform, customizable, native performance without WebView
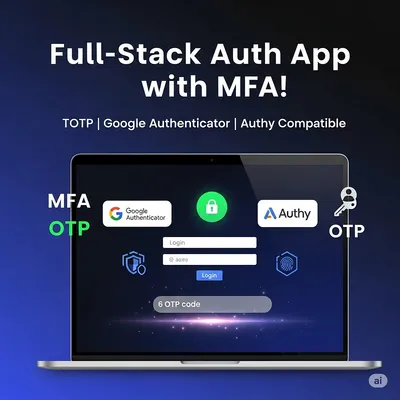
How to Implement Multi-Factor Authentication (MFA) with TOTP in Your Web Application
Learn to implement Multi-Factor Authentication (MFA) with Time-based One-Time Password (TOTP) in your web application for enhanced security