
How to Add TanStack Query in Astro + React Project
Photo by Lautaro Andreani on Unsplash
TanStack Query (formerly known as React Query) is a powerful tool for data fetching, caching, and synchronization in React applications. It simplifies handling server-side state in a predictable and efficient manner. Integrating TanStack Query into an Astro project with React can offer the best of both worlds — Astro’s optimized static site generation with React’s interactivity.
In this blog, I’ll walk you through how to add TanStack Query to your Astro + React project. This process involves setting up the QueryClient in your project and using hooks like useMutation and useQuery to manage data fetching and mutations.
Prerequisites
Astro installed in your project.
React set up in Astro.
TanStack Query installed (
@tanstack/react-query).
If you haven’t installed TanStack Query yet, you can install it using npm or yarn:
npm install @tanstack/react-query
Or with Yarn:
yarn add @tanstack/react-query
1. Set Up Query Client
To integrate TanStack Query, we first need to initialize the QueryClient. This is a central part of the library and is responsible for managing all queries and mutations.
Let’s create a store/index.ts file that will export a queryClient.
// store/index.ts
import { QueryClient } from "@tanstack/react-query";

export const queryClient = new QueryClient();
Here, we simply create a new instance of QueryClient, which will be used across different components in our React application.
2. Using useMutation for Data Submissions
In TanStack Query, useMutation is used to submit or mutate data to the server. For example, let’s consider a form submission where a user registers students. Here is how you can handle a form submission using useMutation.
// any-component.ts
import { useMutation } from "@tanstack/react-query";
import { toast } from "react-hot-toast";
import { queryClient } from '../store';

const submitFormAPI = async (formData) => {
  // API call to submit the form
};

const mutation = useMutation({
  mutationFn: submitFormAPI,
  onSuccess: (data) => {
    toast.success("Registration Successful", {
      description: "The student has been registered successfully.",
    });
    console.log("Submitted data:", data);
    form.reset();
  },
  onError: (error) => {
    toast.error("Registration Failed", {
      description: "There was an error submitting the registration. Please try again.",
    });
    console.error("Error submitting form:", error);
  },
}, queryClient);
In the above code:
submitFormAPIis the function responsible for making an API call to submit form data.mutationFnis the function executed during the mutation.onSuccessandonErrorcallbacks handle the successful and failed states of the mutation.
You can use this mutation object in your component to trigger the form submission and handle the success or error messages via a toast notification.
3. Using useQuery for Fetching Data
The useQuery hook is used for fetching data from the server. Let's say you want to fetch a list of todos. You can achieve that using useQuery as shown below:
// any-component.tsx
import { useQuery } from "@tanstack/react-query";
import { queryClient } from '../store';

const getTodos = async () => {
  // Fetch todos from the API
  const response = await fetch("/api/todos");
  return response.json();
};

const query = useQuery({
  queryKey: ['todos'],
  queryFn: getTodos
}, queryClient);
In this code:
getTodosis a function responsible for fetching the todo list from the API.useQueryfetches the data and caches it using thequeryClientinstance.
4. Handling TanStack Query in Astro + React
In regular React apps, you would typically wrap your application with QueryClientProvider at the root level, but this approach doesn't work as expected in Astro due to its nature of partial hydration and separation of client and server logic.
For Astro + React integration, you don’t need to wrap the QueryClientProvider around your app. Instead, directly import queryClient and pass it into the useMutation or useQuery hooks, as shown in the previous examples. This bypasses the need for a global provider and allows TanStack Query to work within the Astro ecosystem.
5. Complete Example
Here’s a simple example of how you would integrate TanStack Query in a React component within an Astro project.
// src/components/TodoList.tsx
import React from 'react';
import { useQuery } from "@tanstack/react-query";
import { queryClient } from '../store';

const getTodos = async () => {
  const response = await fetch("/api/todos");
  return response.json();
};

const TodoList = () => {
  const { data, error, isLoading } = useQuery({ queryKey: ['todos'], queryFn: getTodos }, queryClient);

  if (isLoading) return <p>Loading...</p>;
  if (error) return <p>Error loading todos</p>;

  return (
    <ul>
      {data.map((todo: any) => (
        <li key={todo.id}>{todo.title}</li>
      ))}
    </ul>
  );
};

export default TodoList;
This component fetches a list of todos and displays them in a list. You can include this component in your Astro pages like this:
---
import TodoList from '../components/TodoList';
---
Conclusion
Integrating TanStack Query into an Astro + React project might seem tricky at first, especially when the typical QueryClientProvider wrap method doesn't work as expected. However, as demonstrated, using queryClient directly within your hooks like useMutation and useQuery is a practical solution. With this setup, you can manage server-side data fetching, mutations, and caching effectively.
Now, you can take full advantage of TanStack Query in your Astro project, ensuring optimized and well-handled server-side state management in your React components.

> Written by
Emdadul Islam
Software Engineer. View profile →
Read more

How to Deploy an AI Agent with Amazon Bedrock AgentCore
Deploy AI agents with Amazon Bedrock AgentCore for scalable configuration on AWS, integrating with frameworks like LangGraph and CrewAI
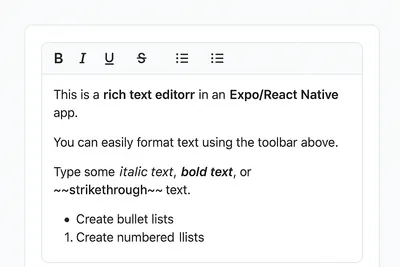
How to Add a Native Rich Text Editor in Expo / React Native (No WebView)
Use expo-rte for a native rich text editor in Expo/React Native, offering cross-platform, customizable, native performance without WebView
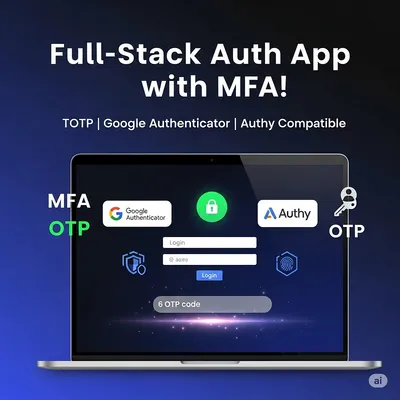
How to Implement Multi-Factor Authentication (MFA) with TOTP in Your Web Application
Learn to implement Multi-Factor Authentication (MFA) with Time-based One-Time Password (TOTP) in your web application for enhanced security