How to Add a Native Rich Text Editor in Expo / React Native (No WebView)
Rich text editing in React Native has always been tricky — especially when you want native performance instead of relying on WebViews. Most available libraries work great for the web, but fall short on mobile.
That’s where [expo-rte](https://github.com/mdadul/expo-rte) comes in.
It’s a pure native rich text editor for Expo and React Native, built using expo-modules, Kotlin, and Swift. No WebView. Fully cross-platform.
In this guide, you’ll learn how to install, set up, and customize expo-rte in your app.
Why expo-rte?
Pure native UI — smooth scrolling, native gestures, no WebView overhead.
Cross-platform — works on both iOS and Android.
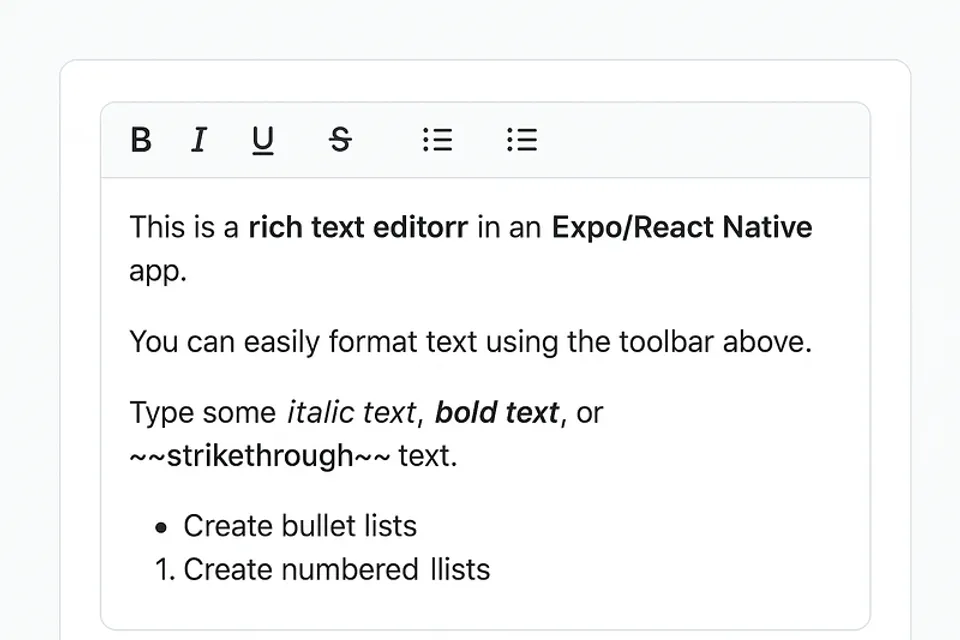
Feature-rich — bold, italic, underline, strikethrough, bullet lists, numbered lists, undo/redo, and more.
Customizable — configure toolbar layout, button density, and styles.
This guide will walk you through installing and using it in your Expo or React Native project.

Install expo-rte
Run:
npm install expo-rte
# oryarn add expo-rte
Since it’s a native module, you’ll need to run a development build (Expo Go won’t work):
npx expo run:iosnpx expo run:android
Add the Editor to Your App
Create a simple editor screen:
import React, { useRef } from 'react';
import { View } from 'react-native';
import { RichTextEditor, RichTextEditorRef } from 'expo-rte';

export default function App() {
    const editorRef = useRef<RichTextEditorRef>(null);
    const handleChange = ({ nativeEvent }) => {
        console.log('Content:', nativeEvent.content);
    };
    return (
        <View style={{ flex: 1, padding: 20 }}>
            <RichTextEditor
                ref={editorRef}
                content="

                Start typing...

                "
                placeholder="Enter your text here..."
                onChange={handleChange}
                style={{ height: 300 }}
        />

    );
}
Customize the Toolbar
expo-rte lets you control which formatting options appear.
import { ToolbarConfig } from 'expo-rte';

const toolbarConfig: ToolbarConfig = {
  adaptive: true,
  density: 'comfortable',
  scrollable: true,
  groupButtons: true,
  buttons: [
    { type: 'bold', icon: 'B', label: 'Bold', group: 'format' },
    { type: 'italic', icon: 'I', label: 'Italic', group: 'format' },
    { type: 'underline', icon: 'U', label: 'Underline', group: 'format' },
    { type: 'bullet', icon: '•', label: 'Bullet List', group: 'list' },
    { type: 'numbered', icon: '1.', label: 'Numbered List', group: 'list' },
    { type: 'undo', icon: '↶', label: 'Undo', group: 'action' },
    { type: 'redo', icon: '↷', label: 'Redo', group: 'action' },
  ],
};
Pass it into your editor:
<RichTextEditor toolbarConfig={toolbarConfig} />
Control the Editor Programmatically
With a ref, you can:
editorRef.current?.setContent('<p>New content</p>');
const html = await editorRef.current?.getContent();
editorRef.current?.undo();
editorRef.current?.redo();
Troubleshooting
Editor not showing? Make sure you’re using a development build.
Buttons not working? Check your
toolbarConfig.Performance issues? Enable
adaptive: truein the toolbar config.
Conclusion: With expo-rte, you can add a native rich text editor to your Expo/React Native app—no WebView required. It’s fast, customizable, and works across iOS and Android.
📌 Full docs & source code: github.com/mdadul/expo-rte

> Written by
Emdadul Islam
Software Engineer. View profile →
Read more
How to Solve the Expo Network Response Timed Out Problem
Solve the Expo network response timed out error by opening the necessary ports on your development machine. Learn step-by-step troubleshooting

How to Deploy an AI Agent with Amazon Bedrock AgentCore
Deploy AI agents with Amazon Bedrock AgentCore for scalable configuration on AWS, integrating with frameworks like LangGraph and CrewAI

How to Implement Multi-Factor Authentication (MFA) with TOTP in Your Web Application
Learn to implement Multi-Factor Authentication (MFA) with Time-based One-Time Password (TOTP) in your web application for enhanced security